Contents
| | .PNG)
|
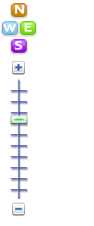
Zoom in and out
Return to contents
Navigate around the map (pan)
- Pan/move the map left-click and hold mouse button in map area and drag the mouse in any direction.
- Move the map a little left-click mouse on one of the
 (north),
  (south),
  (east),
  (west) buttons above the slider tool (Figure 1) in the top left hand corner of the map. Each button click will move the map will slightly in the direction indicated.
Tip - Turn layers off to speed up navigation. The more layers you have turned on, the longer it will take for everything to load each time you zoom or pan.
Return to contents
Layers
- Layers allow you to choose which data is displayed on the map.
Base maps (satellite view)
- The base maps layers are located in the top right corner of the map (Figure 2).
- The layer displayed on the map will be shown in bold.
- Left-click mouse over a different one to change the view e.g. Google Hybrid for satellite view.
| | .PNG)
Figure 2 |
Overlays
- Overlay layers display information such as bore sites, elevation, salinity, geology and other sites of interest.
- To select a layer, simply tick the box next to the overlay name (Figure 3).
- Multiple layers can be chosen, however this may slow down your ability to navigate the map as each layer reloads.
- Layers correspond to the query mode. See Query the map for information for further details.
| | 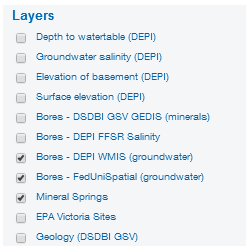
Figure 3
|
Aquifer Layers
- The Advanced aquifer tools layers come from the Victorian Aquifer Framework.
- Click the button to choose to display individual aquifer layers by thickness and elevation (Figure 4).
- To expand an aquifer/aquitard folder click on the corresponding folder (Figure 4). This will show you the different options you can tick .
- Layers correspond to the DEPI Statewide aquifers query mode. See DEPI Statewide aquifers for details on querying. This will also show you how to generate all of the the aquifer layers from a point on the map.
| | .PNG)
Figure 4
|
Note: The layers in Advanced aquifer tools can be slow to load, and will still process even if you untick a layer. If the layers are still loading, you will see a pink bar  in the lower right-hand side of the map.
Return to contents
Reorder map layers (move layer to front/back)
- This tool changes the order that a layer appears (e.g. bring bores to the front so you can see them over the geology overlay).
- Click on the
 button located in the top right tabs above the map. button located in the top right tabs above the map. - Under 'Active Layer Options' (Figure 5) the layers you have selected to appear on the map will be listed.
- The layers are in order from the top of the list to the bottom as they are on the map front to back.
- To move a layer, left-click mouse over layer and drag up or down to desired position.
| | 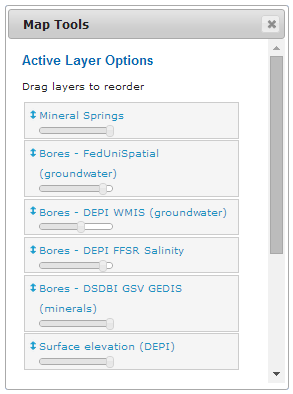
Figure 5 |
Tip: You can still use the map and its functions whilst Map Tools is open. You can also move and resize it to a more convenient location within your window.
Return to contents
Scale of map
- The map scales are found in the lower left corner of the map (Figure 6). These will change as you zoom in and out.
- A representative fraction is included as well as a graphic scale showing metric and imperial units. These units are shown in metres or kilometres and feet or miles
| | 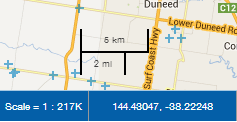
Figure 6 |
Return to contents
Legend display
- This is a tab found in the lower right side of the portal (Figure 7).
- A legend will appear for each layer that is selected.
- If multiple layers are selected, you may need to scroll down to see them all.
| | 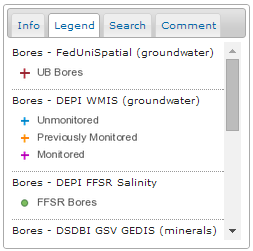
Figure 7 |
Return to contents
 or out
  button in the top left hand corner of the map (Figure 1). Alternatively drag the zoom slider
 up (+) to see more detail in a smaller region or down (-) to see less detail in a larger region.